Added Items to the cart
How to Set Up Holographic
Stickers and Labels!
Setting Up Your Holographic Stickers or Labels
We want your stickers and labels to perfectly match the vision for your artwork. To achieve the best outcome with your Holographic product, here are some setup guidelines to take out some of the guesswork!
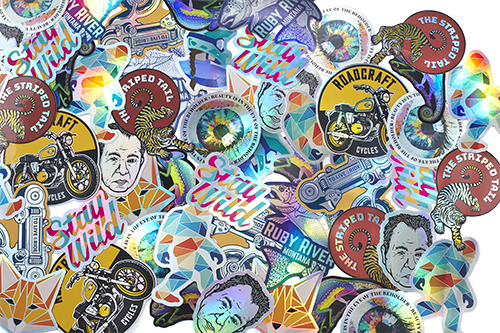
Art Setup & Printing 101
The keys to holographic stickers are the material, the white layer and your artwork. Think of your stickers in layers, with the bottom layer being the holographic material of the sticker itself and layers of ink printed on top from lightest to darkest—similar to the process of screen printing.
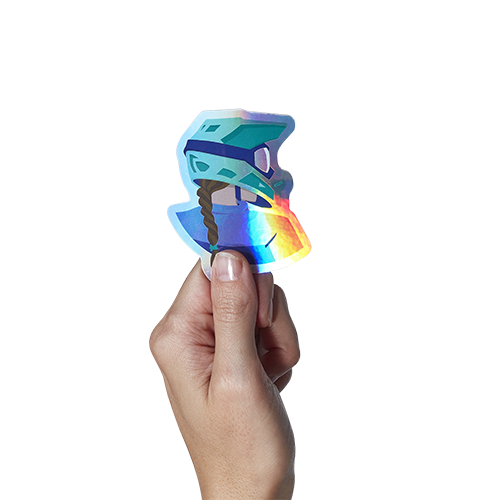
More layers of ink = less holographic effect, but more emphasis on the artwork.
Fewer layers of ink = more holographic effect, but colors and details can appear more muted depending on the color, lighter colors in particular, and lighting conditions where the sticker is placed.
Based on your design and how you set up your file, you can pick and choose the areas you want to appear more holographic. Check out our guidelines below on how to get the design and holographic effects just right for your work!
Still feel confused? We offer graphic art support! Our design team is here to help ensure your files are set up for perfect printing. Just give us a shout!
If You Want Your Designs To Pop More Than the Holographic Look:
Include White Backup Layer
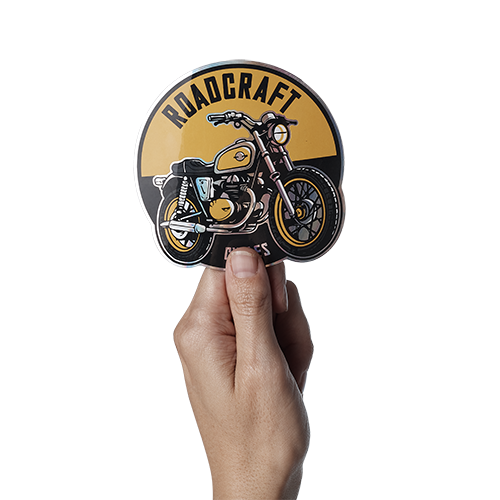
A white backup is a layer of ink that is printed behind your design, making the colors in your artwork more vibrant and opaque. This is particularly important if your design contains light or transparent colors, as they may appear washed out or muted on the holographic material.
A white backup layer adds contrast to let your design stand out against the holographic material. You should always apply a white backup to the elements of your design that you really want to pop! The final product will still maintain the holographic effect where there is no white ink backup, ensuring that your art will definitely stand out.
How To Add a White backup Layer (in Adobe Illustrator):
- Duplicate your artwork layer
- Change the color of the duplicated layer to white and rename the layer to “WHITE BACKUP”
- Place the white backup layer behind your original artwork layer
- Remember to exclude any areas you want to be fully holographic or colored holographic
Still feel confused? We offer graphic art support! Our design team is here to help ensure your files are set up for perfect printing. Just give us a shout!
If You Want The Holographic Effect ONLY in Certain Areas of Your Design:
Include Transparent Aspects (or “Punched Out”)
Leaving transparent space in your design file without a white backup layer will allow the metallic, rainbow holographic material to shine through your design.
If you want the metallic holographic material to shine through fully, leave the space transparent and do NOT include a white backup layer. The absence of a white ink backup will show the holographic effect in your artwork.
Get creative with your holographic product and find unique ways for those iridescent elements to shine through, even if it’s just the border of the sticker! Leave your background transparent around the edge of your design to achieve this effect
How to Create Spot Areas with Holographic effect In Your Art File
Create a separate layer in your art with transparent areas where you would like the holographic effect applied.
How to Create Shades of the Holographic Effect in Spot Areas
Create a separate layer in your art with semi-transparent areas where you would like the holographic effect applied.
Still feel confused? We offer graphic art support! Our design team is here to help ensure your files are set up for perfect printing. Just give us a shout!
If You Want A Colorful Holographic Effect:
Bump Up the Saturation
If you want colored ink with holographic elements in your design, you can increase the color saturation to avoid the color blending too much with the holographic material but it is not necessary however your colors may get lost a bit in the holographic effect. This can be particularly effective if you want to use colored holographic in between elements WITH a white backup.
For a Complete Holographic Effect Everywhere:
No White Backup
By default, we add a white backup to all of our holographic stickers. All you have to do is say “No white backup” in the special instructions when the artwork is submitted.
Fair warning: If your image has a lack of contrast or includes very light colors, this might not be the best option if you want your design to appear more prominent as the holographic effect can mute the colors and allow them to blend together.
Still feel confused? We offer graphic art support! Our design team is here to help ensure your files are set up for perfect printing. Just give us a shout!